Create Music Remote System Using BBC Micro :Bit


Create Music Remote System Using BBC Micro :Bit
In this tutorial, I will show how to make music remote system using BBC Micro:Bit. If you don’t know about Micro:Bit, see Getting Started with Micro:Bit.
So, let’s get started.
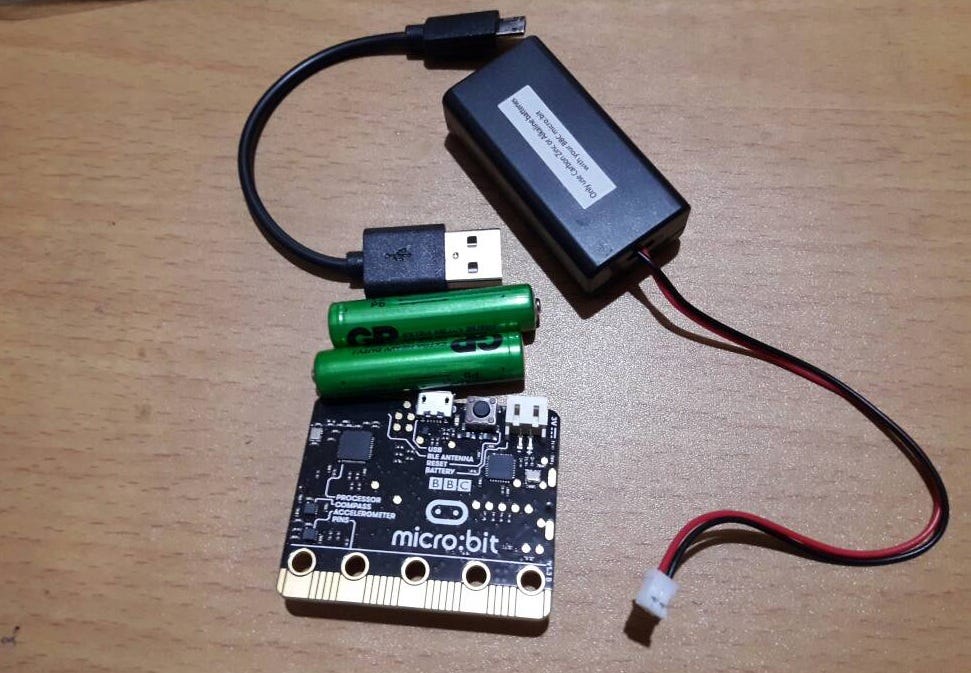
Tools you need
- Micro:Bit (1 pcs)
- USB Cable (1 pcs)
- Battery AAA 1.5V(2 pcs)
- Battery Box (1 pcs)
- Micro:Bit App

Pre-Test
So, let’s test our micro: bit before programming it. There are two ways to test your micro: bit.
- via USB cable You can test your micro: bit just to see if it is working fine or not. To do so, connect your micro: bit to your computer via USB cable and wait for a second. Your micro: bit will display “HELLO” by blinking LEDs. If it does, then it is working fine.
- via Battery Connector Insert batteries into battery box and connect your micro bit via power pins and then see if it is displaying “HELLO”. If it is then it is working fine.
So, now, let us see how we can make our Micro:Bit control our phone’s music player. In this tutorial, we are going to use Bluetooth to connect to Micro:Bit and control our phone’s music player via Bluetooth. Given below are some steps to follow.
Open your Micro:Bit App
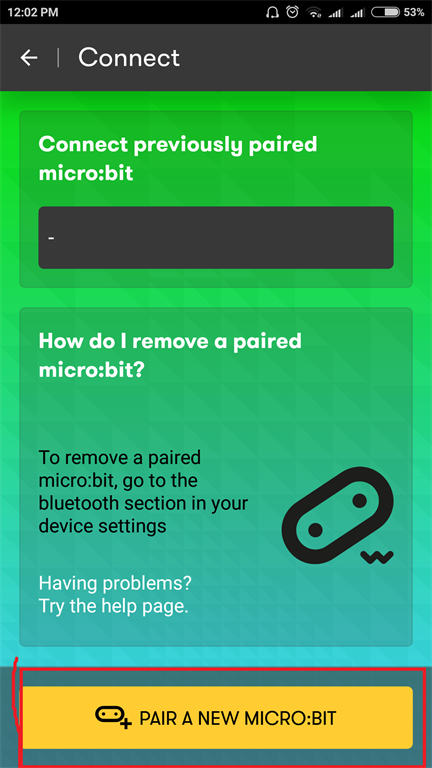
You will see the following screen.There are four options.
- Connect This option is used to connect to new Micro:Bit device or already paired device in order to communicate or to program the Micro:Bit device.
- Flash This option is used to upload or flash the code to Micro:Bit that it is ready already. I mean that the code is already there in the form of some samples to test the functionalities of Micro:Bit and that code we will be able to upload on Micro:Bit using this option.
- Create Code This option is used to create the code for Micro:Bit.
- Discover Using this option, you will be able to learn more about BBC Micro:Bit. Simply, it will redirect you to Micro:Bit website.


Then, click on “PAIR A NEW MICRO:BIT”.

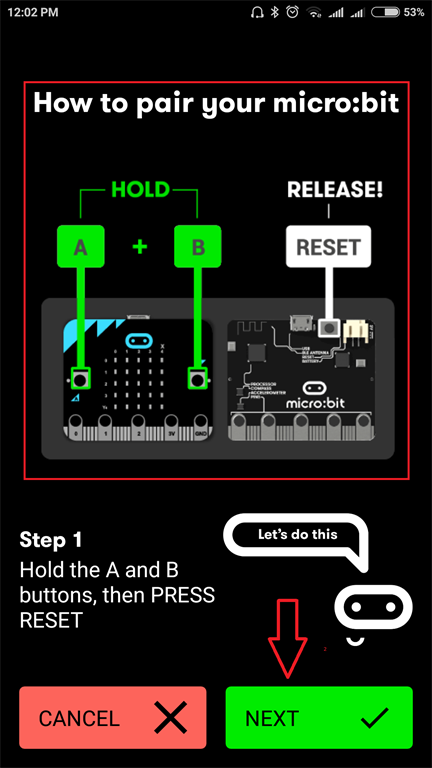
Then, you will see instructions how to pair your Micro:Bit. As you’re seeing below, you just need to hold both — A and B — then press and release the RESET button.
If your Bluetooth is ON, then OK; otherwise, it will ask you to allow the app to turn on your phone’s Bluetooth. Here, click on “Allow”.
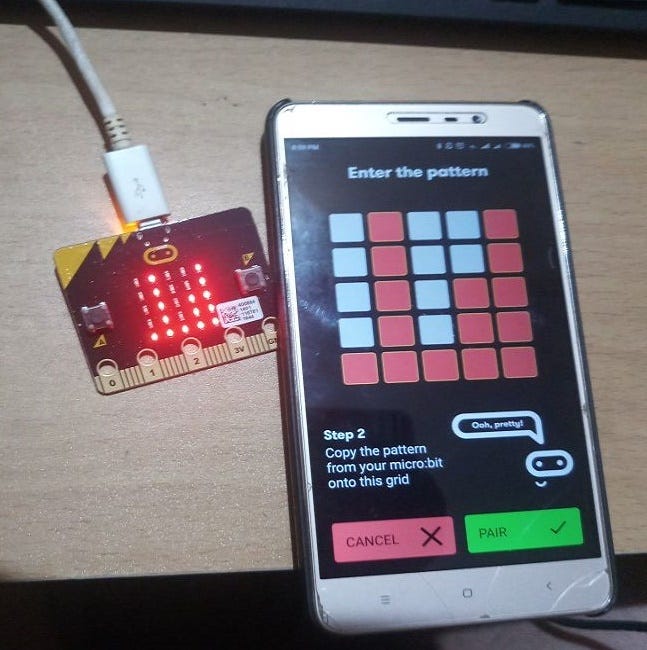
You will see “Pairing Mode” on your Micro:Bit.
You need to click on the “Next” button as shown below.

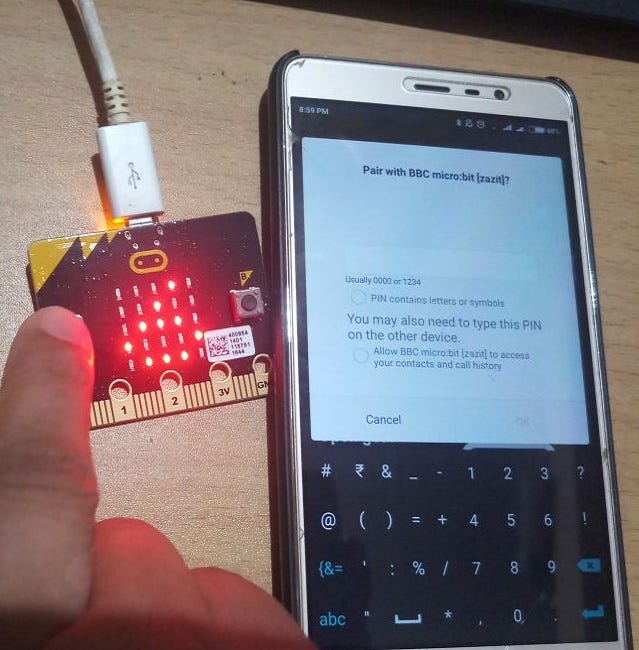
After this, you will be asked to enter the pattern that you see on your Micro:Bit.
Now, you just need to enter the pattern on your phone as you see in Micro:Bit. Just click on “Pair”.

After this, you will see the Bluetooth notification on your phone and pairing codes on your Micro:Bit .You will see Micro:Bit displaying code one by one. So, enter the code on your phone and click on “pair”.

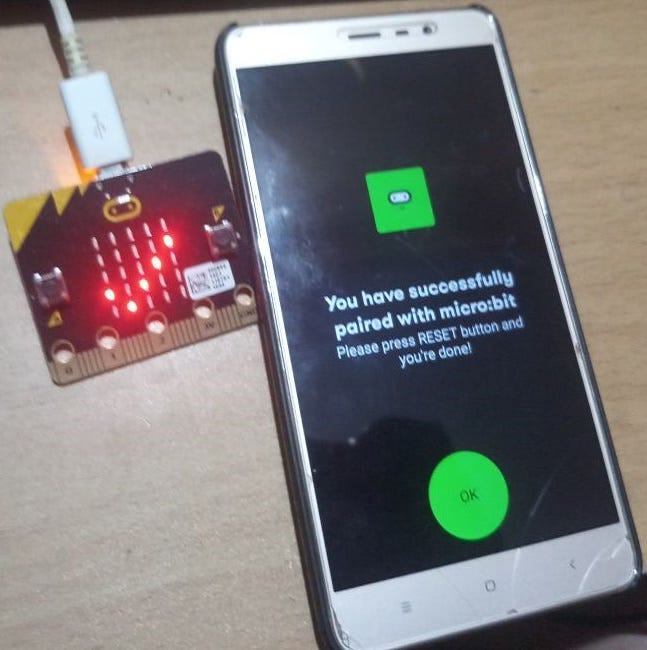
Now, you’re done. If both the codes match, you will see the TICK on your Micro:Bit and confirmation on your phone stating — “You have successfully paired with Micro:Bit” or “you have connected your Micro:Bit”.

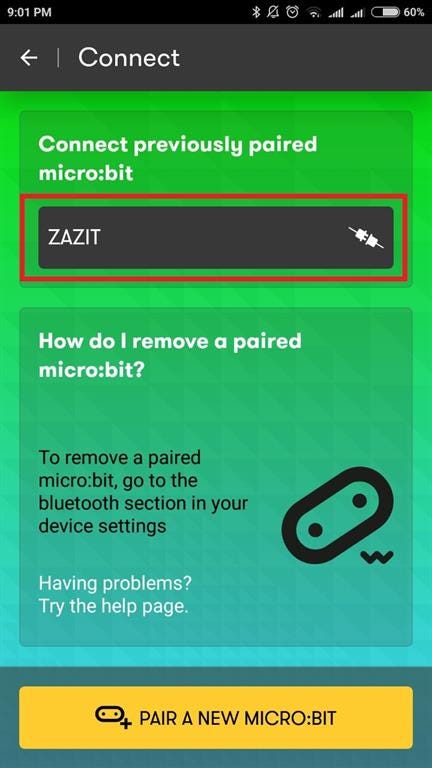
Then, you will see your Micro:Bit’s name on the screen. In the below snapshot, ZAZIT is Micro:Bit name.

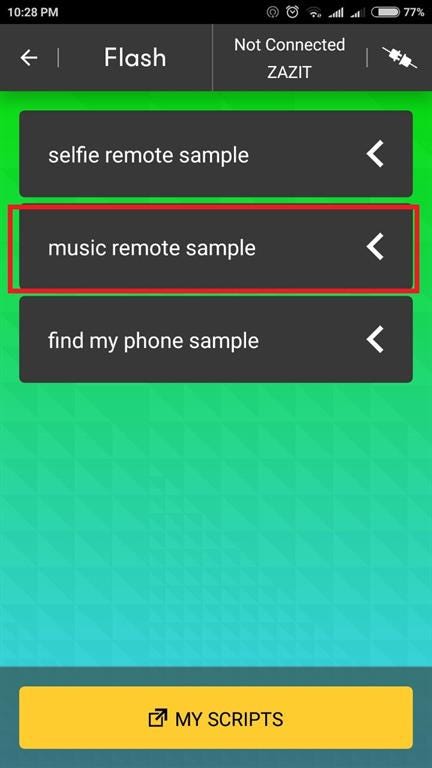
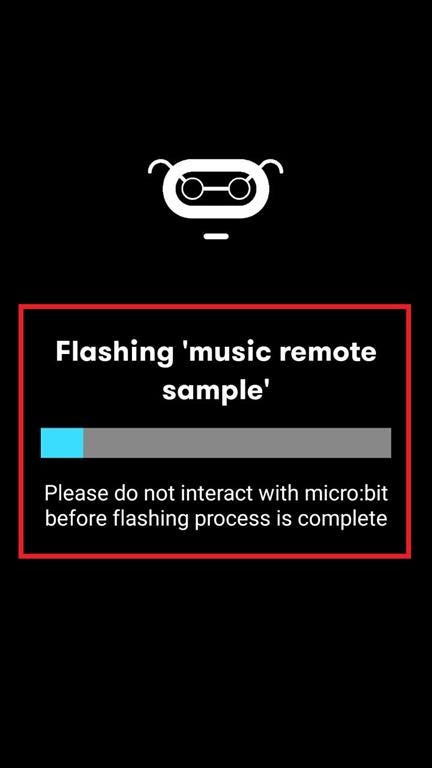
Now, we just need to upload the code and see the magic. Click on “FLASH” on Micro:Bit App and choose “Music Remote Sample”. You can try other options too following the same process.

The app will upload/flash the sample code on the Micro:Bit and then you will be able to control the Music player using Micro:Bit.

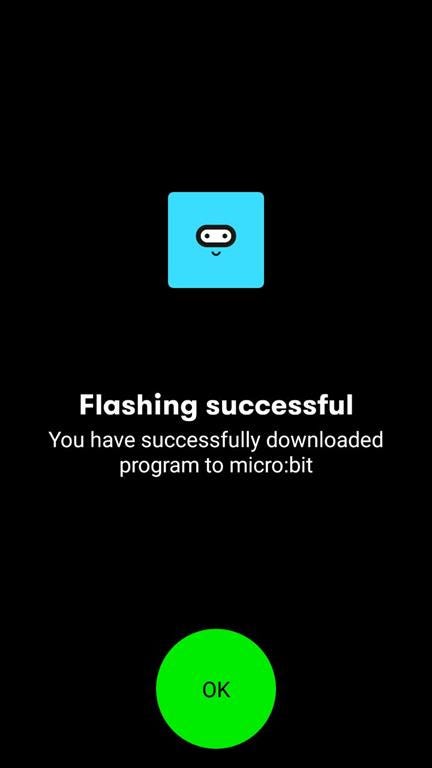
You will see the confirmation like this. Click “OK” and you’re good to go.

Now, open your Music player and press A and B and both the buttons together or one by one for controlling the music player.
You can see the demo:
